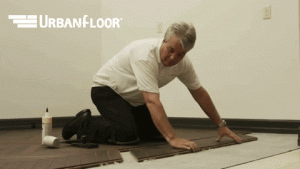
Embarking on a hardwood flooring installation project can be an incredibly rewarding DIY endeavor, transforming your living space with the timeless elegance of natural wood.
However, success hinges on having the right tools at your disposal. This ultra-detailed guide will equip you with a comprehensive list of essential tools, categorized for clarity and accompanied by expert insights, ensuring a smooth and professional-looking installation.
I. Essential Measurement and Layout Tools: Precision is Paramount
- Measuring Tape (25-foot minimum):
- Accurate measurements are the foundation of any successful flooring project.
- A long tape measure allows you to measure entire rooms without piecing together smaller measurements, minimizing errors.
- Chalk Line:
- Creating straight, visible lines is crucial for laying the first row of planks and ensuring a consistent pattern.
- A chalk line snaps a straight line onto the subfloor, serving as a reliable guide.
- Level (4-foot or longer):
- Ensuring a level subfloor is essential for a stable and even hardwood floor.
- A long level allows you to check for unevenness across larger areas, identifying potential problem spots.
- T-Square or Speed Square:
- These tools are invaluable for creating accurate 90-degree angles when cutting planks, especially around corners and obstacles.
- Pencil or Marking Tool:
- For marking cut lines and reference points on planks and the subfloor.
- Stud Finder:
- If nailing to a wood subfloor, a stud finder can help locate the floor joists to nail into, for added stability.
II. Cutting and Shaping Tools: Precision and Control
- Circular Saw:
- A powerful and versatile tool for making straight cuts across hardwood planks.
- A carbide-tipped blade designed for hardwood flooring is recommended for clean and precise cuts.
- Jigsaw:
- Essential for making curved cuts, intricate shapes, and cutouts around obstacles like pipes and vents.
- A fine tooth blade is recommended.
- Miter Saw (Optional but Recommended):
- For precise angle cuts, especially when installing baseboards and moldings.
- This tool greatly speeds up the process of cutting end pieces.
- Handsaw (Back-up):
- A handsaw can be useful for making small, precise cuts or for tight spaces where power tools are impractical.
- Utility Knife:
- For scoring and cutting underlayment and trimming excess moisture barrier.
III. Installation Tools: Securing Your Hardwood
- Flooring Nailer (Pneumatic or Manual):
- Essential for nail-down installations, securing solid hardwood planks to the subfloor.
- Pneumatic nailers offer faster and more consistent nailing.
- Cleats, or flooring nails, are used with this tool.
- Tapping Block and Mallet:
- Used to gently tap the planks together, ensuring a tight and seamless fit.
- A tapping block protects the tongue and groove edges from damage.
- Pull Bar:
- Used to pull the planks tightly against the wall, especially in tight spaces.
- Spacers:
- Essential for creating consistent expansion gaps between the planks and the walls, allowing for natural wood movement.
- Putty Knife:
- Used for applying wood filler, or wood putty, when repairing damaged areas.
IV. Subfloor Preparation Tools: Ensuring a Stable Foundation
- Vacuum Cleaner:
- For thoroughly cleaning the subfloor, removing dust, debris, and any remnants of old flooring.
- Scraper:
- For removing adhesive residue, paint, or other stubborn materials from the subfloor.
- Self-Leveling Compound (and Related Tools):
- For leveling uneven concrete subfloors.
- This requires a mixing bucket, and trowel.
- Moisture Meter:
- Used to check the moisture content of the subfloor, and the hardwood flooring, before installation.
- Moisture Barrier (and related tools):
- Poly sheeting, or other moisture barrier, and tape, for sealing the seams.
V. Finishing Tools: Adding the Polished Touches
- Hammer:
- For installing baseboards and moldings.
- Nail Set:
- For countersinking nails when installing baseboards and moldings.
- Caulk Gun:
- For applying caulk to seal gaps along the edges of the flooring.
- Wood Filler (and related tools):
- For filling nail holes, and other imperfections.
VI. Safety Gear: Protecting Yourself
- Safety Glasses:
- Essential for protecting your eyes from flying debris.
- Knee Pads:
- For protecting your knees during prolonged periods of kneeling.
- Gloves:
- For protecting your hands from splinters and sharp edges.
- Respirator (Optional but Recommended):
- For protecting your lungs from dust and fumes, especially when sanding or working with adhesives.
Expert Tips for Tool Selection and Usage:
- Invest in Quality: Choose high-quality tools that will withstand the demands of hardwood flooring installation.
- Rent or Borrow: For tools you won’t use frequently, consider renting or borrowing them.
- Read the Instructions: Familiarize yourself with the operating instructions for each tool before use.
- Maintain Your Tools: Keep your tools clean and in good working order for optimal performance.
- Prioritize Safety: Always wear appropriate safety gear and follow safety guidelines.
By equipping yourself with this comprehensive toolkit and adhering to expert advice, you can confidently tackle your hardwood flooring installation project, achieving stunning and lasting results.