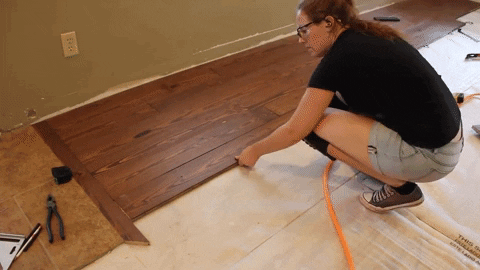
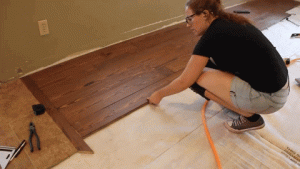
Embarking on a hardwood flooring installation project can be an incredibly rewarding endeavor, but it’s understandable to encounter challenges along the way.
Whether you’re a seasoned DIY enthusiast or a first-time homeowner, this comprehensive guide serves as your ultimate resource for hardwood floor installation help, addressing common issues, providing expert solutions, and ensuring a stunning and lasting finish.
I. Identifying Common Hardwood Installation Hurdles: Pinpointing the Problem
- 1. Subfloor Inconsistencies:
- The Issue: Uneven, damaged, or insufficiently prepared subfloors.
- The Help:
- Thoroughly inspect the subfloor for irregularities.
- Use self-leveling compound for concrete subfloors.
- Secure loose boards or replace damaged sections in wood subfloors.
- Clean the subfloor meticulously, removing debris and adhesive residue.
- 2. Moisture Management Mishaps:
- The Issue: Excessive moisture in the subfloor or inadequate moisture barriers.
- The Help:
- Conduct moisture tests to determine subfloor moisture levels.
- Install a high-quality moisture barrier, especially over concrete.
- Ensure proper ventilation during and after installation.
- Allow adequate acclimation of the hardwood.
- 3. Acclimation Challenges:
- The Issue: Failure to properly acclimate hardwood to the room’s environment.
- The Help:
- Acclimate hardwood for at least 48-72 hours in the installation area.
- Maintain consistent temperature and humidity.
- Use a moisture meter to verify wood moisture content.
- 4. Layout and Measurement Errors:
- The Issue: Incorrect layout planning or inaccurate measurements.
- The Help:
- Create a detailed floor plan, accounting for room dimensions and obstacles.
- Use a chalk line for straight starting lines.
- Double-check measurements before cutting.
- 5. Cutting and Fitting Difficulties:
- The Issue: Challenges with cutting planks accurately, especially around corners and obstacles.
- The Help:
- Use the appropriate saw for each type of cut (circular saw, jigsaw, miter saw).
- Create templates for complex shapes.
- Practice cutting on scrap pieces.
- Take your time, and measure multiple times.
- 6. Nailing and Gluing Complications:
- The Issue: Incorrect nailing angles, spacing, or adhesive application.
- The Help:
- Use the correct flooring nailer and nails or cleats.
- Follow adhesive manufacturer’s instructions.
- Always follow the manufactures instructions for the flooring being installed.
- 7. Expansion Gap Issues:
- The Issue: Inadequate or inconsistent expansion gaps.
- The Help:
- Use spacers to maintain consistent gaps.
- Follow manufacturer’s recommendations for gap width.
- Cover gaps with baseboards or moldings.
- 8. Finishing and Transition Challenges:
- The Issue: Problems with staining, finishing, or creating smooth transitions between rooms.
- The Help:
- Choose a finish compatible with the hardwood.
- Apply finish evenly and in thin coats.
- Use transition pieces or custom moldings.
- Use flexible caulk to fill small gaps.
II. Expert Solutions and Troubleshooting: Overcoming Installation Obstacles
- 1. Subfloor Remediation:
- Solution:
- Use leveling compound for minor unevenness.
- Install plywood underlayment for major unevenness.
- Replace rotted or damaged subfloor sections.
- Solution:
- 2. Moisture Mitigation:
- Solution:
- Apply a liquid moisture barrier or install polyethylene sheeting.
- Use a dehumidifier to control humidity.
- Address any underlying moisture sources.
- Solution:
- 3. Acclimation Optimization:
- Solution:
- Stack hardwood planks in the center of the room.
- Use spacers between planks for air circulation.
- Monitor room humidity and temperature.
- Solution:
- 4. Layout and Measurement Refinement:
- Solution:
- Create a detailed diagram of the room.
- Use a laser measure for accurate dimensions.
- Dry-fit planks before installation.
- Solution:
- 5. Cutting and Fitting Techniques:
- Solution:
- Use a jigsaw for intricate cuts and curves.
- Create templates for complex shapes.
- Practice cutting on scrap wood.
- Solution:
- 6. Nailing and Gluing Best Practices:
- Solution:
- Use the correct nailer and nails for the flooring type.
- Apply adhesive evenly and in the recommended pattern.
- Follow the manufactures instructions.
- Solution:
- 7. Expansion Gap Management:
- Solution:
- Use spacers of the appropriate size.
- Maintain consistent gaps around the perimeter.
- Conceal gaps with baseboards or quarter-round moldings.
- Solution:
- 8. Finishing and Transition Mastery:
- Solution:
- Test stain colors on scrap wood.
- Apply multiple thin coats of finish.
- Use transition pieces for smooth transitions.
- Use caulk to fill any small gaps.
- Solution:
III. Essential Tips for a Smooth Installation: Preventing Problems Before They Arise
- 1. Thorough Planning:
- Plan the installation process meticulously, including layout, material selection, and tools.
- 2. Tool Proficiency:
- Familiarize yourself with the tools and practice using them before installation.
- 3. Manufacturer’s Guidance:
- Adhere to the manufacturer’s instructions for the hardwood flooring and installation materials.
- 4. Safety First:
- Wear appropriate safety gear, including safety glasses, gloves, and knee pads.
- 5. Patience and Precision:
- Take your time and focus on accuracy to achieve a professional finish.
- 6. Seek Professional Help:
- When in doubt, consult a professional.
IV. Common Questions and Answers: Addressing Your Concerns
- Q: How do I prevent squeaking in my hardwood floors?
- A: Ensure a level subfloor, use appropriate fasteners, and maintain consistent humidity levels.
- Q: What’s the best way to cut hardwood around curved walls?
- A: Create a template and use a jigsaw for precise cuts.
- Q: How do I choose the right finish for my hardwood floors?
- A: Consider the wood species, traffic levels, and desired aesthetic.
- Q: How do I handle transitions between hardwood and other flooring types?
- A: Use transition pieces or custom moldings to create a smooth and seamless transition.
By utilizing this comprehensive guide and seeking additional help when needed, you can confidently install your hardwood floors, creating a beautiful and lasting investment for your home.