Embark on your DIY hardwood flooring journey! This ultimate guide covers everything from preparation to finishing, ensuring a flawless installation for beginners. Learn expert tips and avoid common pitfalls.
Dreaming of the warmth and elegance of hardwood floors? You’re not alone. Hardwood flooring adds timeless beauty and value to any home. While it might seem daunting, installing hardwood floors is a manageable DIY project with the right guidance. This comprehensive guide is designed for beginners, walking you through every step of the process, from preparation to the final flourish. We’ll cover essential tools, techniques, and troubleshooting tips to ensure a successful and satisfying installation.
Section 1: Planning and Preparation: The Key to a Perfect Floor
- 1.1 Acclimation: The Golden Rule
- Hardwood flooring is a natural product that expands and contracts with changes in temperature and humidity. Acclimation is crucial to prevent warping, gaps, and buckling.
- How to Acclimate:
- Purchase your hardwood flooring a few days to a week before installation.
- Store the flooring in the room where it will be installed, allowing it to adjust to the room’s conditions.
- Maintain a consistent temperature and humidity level (ideally between 60-80°F and 30-50% humidity).
- Spread the planks out, allowing air to circulate around them.
- 1.2 Subfloor Inspection and Preparation
- A solid, level subfloor is essential for a stable hardwood floor.
- Types of Subfloors:
- Plywood/OSB: Ensure it’s clean, dry, and securely fastened.
- Concrete: Moisture testing is critical. Use a moisture barrier if needed. Level any uneven areas.
- Leveling:
- Use a level to identify high and low spots.
- For low spots, apply leveling compound.
- For high spots, sand or plane them down.
- Cleaning:
- Thoroughly sweep and vacuum the subfloor to remove dust and debris.
- 1.3 Essential Tools and Materials
- Gathering the right tools will make your installation smoother.
- Tools:
- Measuring tape
- Chalk line
- Circular saw or table saw
- Miter saw (optional, but helpful)
- Hammer or flooring nailer
- Pry bar
- Rubber mallet
- Tapping block
- Level
- Stud finder
- Safety glasses and hearing protection
- Materials:
- Hardwood flooring planks
- Underlayment (moisture barrier, sound barrier)
- Flooring nails or staples
- Wood glue (if needed)
- Spacers
- Transition pieces (thresholds, reducers)
- Baseboards and shoe molding
- 1.4 Determining the Layout
- Planning the layout prevents awkward cuts and wasted material.
- Direction:
- Typically, run planks perpendicular to floor joists for stability.
- Consider the room’s shape and light source.
- For narrow rooms run the boards lengthwise.
- Starting Point:
- Begin along the longest, straightest wall.
- Use a chalk line to create a straight starting line.
Section 2: The Installation Process: Step-by-Step Guide
- 2.1 Installing the Underlayment
- Underlayment provides a moisture barrier, reduces noise, and creates a smooth surface.
- Roll out the underlayment and cut it to fit the room.
- Butt the edges together and tape them securely.
- 2.2 Laying the First Row
- The first row is crucial for a straight and even floor.
- Leave a to inch expansion gap between the planks and the wall.
- Use spacers to maintain the gap.
- Fasten the planks to the subfloor using flooring nails or staples, driven at a -degree angle through the tongue.
- Use a nailer for best results.
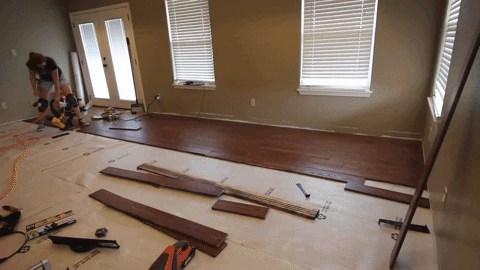
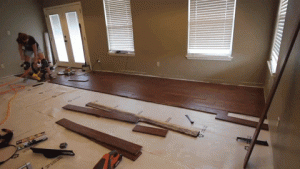
- 2.3 Continuing the Installation
- Stagger the end joints of the planks to create a visually appealing pattern and add stability.
- Use a tapping block and rubber mallet to gently tap the planks together.
- Cut the last plank in each row to fit, leaving an expansion gap.
- Use the cut off end to start the next row to minimize waste.
- 2.4 Working Around Obstacles
- When encountering doorways, pipes, or other obstacles, carefully measure and cut the planks to fit.
- Use a jigsaw for curved cuts.
- Leave expansion gaps around pipes.
- 2.5 Installing the Last Row
- The last row may require ripping (cutting lengthwise) to fit.
- Use a pry bar to gently tap the planks into place.
- Leave an expansion gap.
Section 3: Finishing Touches: Enhancing Your Hardwood Floors
- 3.1 Installing Transition Pieces
- Transition pieces cover gaps between different flooring types or levels.
- Install thresholds at doorways and reducers between hardwood and thinner flooring.
- 3.2 Installing Baseboards and Shoe Molding
- Baseboards and shoe molding conceal the expansion gap and add a finished look.
- Cut the molding to fit using a miter saw.
- Nail the molding to the wall, not the floor.
- 3.3 Cleaning and Maintenance
- Sweep or vacuum the floors regularly.
- Use a damp mop with a hardwood floor cleaner.
- Avoid excessive moisture.
- Place felt pads under furniture legs to prevent scratches.
Section 4: Troubleshooting Common Issues
- 4.1 Gaps Between Planks
- Cause: Insufficient acclimation, improper installation.
- Solution: Ensure proper acclimation, use a tapping block, and maintain consistent pressure.
- 4.2 Buckling or Warping
- Cause: Excessive moisture, improper expansion gaps.
- Solution: Address moisture issues, ensure proper expansion gaps.
- 4.3 Squeaking Floors
- Cause: Loose subfloor, improper nailing.
- Solution: Secure the subfloor, use appropriate fasteners.
- 4.4 Uneven Floors
- Cause: Uneven subfloor, improper levelling.
- Solution: level the subfloor prior to installation.
Conclusion:
Installing hardwood floors is a rewarding DIY project that adds beauty and value to your home. By following these steps and tips, you can achieve a professional-looking result.
Remember to take your time, be patient, and prioritize safety. With careful planning and execution, you’ll be enjoying your stunning hardwood floors for years to come.