
Dreaming of luxurious hardwood floors but intimidated by the installation process? Click-lock hardwood flooring offers a user-friendly solution, empowering homeowners to achieve professional-looking results with minimal hassle.
This extensive guide will demystify the click-lock installation process, providing in-depth instructions, expert tips, and essential SEO-rich information to elevate your DIY skills and transform your living space.
Why Click-Lock Hardwood is Revolutionizing Home Flooring:
Click-lock flooring, primarily used with engineered hardwood, has become a game-changer for homeowners seeking a beautiful and durable flooring solution. Its innovative tongue-and-groove system allows planks to seamlessly interlock without the need for messy adhesives or laborious nailing, creating a “floating floor” that rests gracefully on an underlayment.
Key Advantages for the DIY Enthusiast (and Beyond):
- Simplified Installation: The click-lock mechanism significantly reduces installation time and complexity, making it a viable DIY project for homeowners of all skill levels.
- Reduced Material Costs: Eliminating the need for specialized adhesives or extensive nailing reduces material expenses, making it a budget-friendly option.
- Easy Plank Replacement: Damaged or worn planks can be easily removed and replaced without disturbing the entire floor, ensuring long-term maintenance convenience.
- Versatile Subfloor Compatibility: Click-lock flooring can be installed over a variety of subfloors, including concrete, plywood, and existing tile, offering greater flexibility.
- Enhanced Comfort and Sound Insulation: The underlayment used with click-lock flooring provides cushioning and sound absorption, creating a more comfortable and quieter living environment.
Pre-Installation Essentials: Laying the Foundation for Success:
- Subfloor Inspection and Preparation: The Cornerstone of a Flawless Finish:
- Thoroughly inspect the subfloor for any imperfections, such as uneven spots, cracks, or moisture damage.
- Clean the subfloor meticulously, removing all debris, nails, and remnants of old flooring.
- For concrete subfloors, conduct a moisture test and install a moisture barrier if necessary.
- Level any uneven areas using self-leveling compound or plywood underlayment.
- Acclimation: Allowing Your Hardwood to Adapt:
- Acclimation is a critical step that prevents warping and expansion issues after installation.
- Bring the hardwood flooring planks into the room where they will be installed at least 48-72 hours before starting the project.
- Ensure the room’s temperature and humidity are consistent with normal living conditions.
- Underlayment Installation: Providing Cushioning and Protection:
- Choose an underlayment that is compatible with your subfloor and hardwood flooring.
- Install the underlayment according to the manufacturer’s instructions, ensuring a smooth and even surface.
- Overlap the underlayment seams and secure them with tape to prevent moisture penetration.
- Gathering Your Arsenal: Essential Tools and Materials:
- Hardwood flooring planks
- Underlayment
- Measuring tape
- Pencil
- Circular saw, jigsaw, or handsaw
- Tapping block and mallet
- Spacers
- Pull bar
- Safety glasses
- Knee pads
The Click-Lock Installation Process: A Step-by-Step Guide:
-
Strategic Layout Planning: Visualizing Your Finished Floor:
- Determine the starting point and direction of the flooring, considering the room’s shape and natural light.
- It is often recommended to start along the longest wall to minimize cuts and create a more visually appealing flow.
- Plan the layout to minimize narrow planks at the end of rows, ensuring a balanced and professional look.
- Consider how the flooring will transition into other rooms.
-
Laying the First Row: Establishing a Solid Foundation:
- Place spacers along the wall to create an expansion gap of approximately 1/4 to 1/2 inch, allowing for natural wood movement.
- Begin laying the first row of planks, with the tongue side facing the wall.
- Click the planks together securely, ensuring a tight and seamless connection.
-
Continuing the Rows: Creating a Random and Natural Pattern:
- Stagger the end joints of subsequent rows to create a random pattern, enhancing the natural beauty of the hardwood.
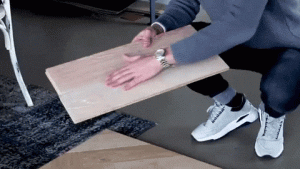
- Use a tapping block and mallet to gently tap the planks together, ensuring a tight fit.
- For tight spaces or difficult angles, use a pull bar to pull the planks into place.
- When starting a new row, use the leftover cut piece from the previous row, this saves on material, and ensures a random pattern.
-
Precision Cutting: Navigating Obstacles and Edges:
- Measure and mark the planks accurately for cutting, accounting for expansion gaps.
- Use a saw to cut the planks cleanly and precisely.
- When cutting planks around obstacles, such as pipes or vents, create a template out of cardboard for accurate measurements.
- For the final row, you will likely need to cut the planks lengthwise.
-
Final Row and Finishing Touches: Completing the Transformation:
- For the final row, use a pull bar to install the planks tightly against the wall.
- Remove the spacers and install baseboards or moldings to cover the expansion gaps, creating a polished and finished look.
- Clean up any debris.
Essential Tips and Considerations for a Flawless Installation:
- Expansion Gaps: Allowing for Natural Wood Movement:
- Expansion gaps are crucial for preventing warping and buckling due to temperature and humidity fluctuations.
- Ensure consistent expansion gaps around the perimeter of the room and around any obstacles.
- Moisture Management: Protecting Your Investment:
- Address any moisture issues in the subfloor before installation to prevent damage to the hardwood flooring.
- Use appropriate moisture barriers when necessary, especially in damp environments.
- Safety First: Prioritizing Your Well-Being:
- Wear safety glasses and knee pads to protect yourself during installation.
- Use caution when operating power tools, following all safety guidelines.
- Manufacturer’s Instructions: Adhering to Expert Guidance:
- Always refer to the manufacturer’s instructions for specific installation guidelines and recommendations.
By following this comprehensive guide and adhering to expert tips, you can confidently install click-lock hardwood flooring, transforming your living space into a haven of beauty and elegance.