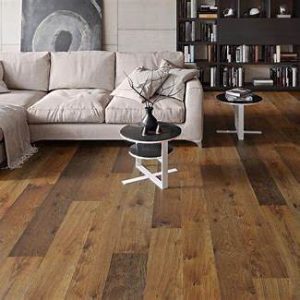
Hardwood floors, a hallmark of elegance and durability, demand a structured approach to care. This guide transcends basic maintenance, providing a detailed, step-by-step journey to ensure your floors maintain their pristine beauty for generations. We’ll explore each phase of care, from daily routines to deep restoration, with meticulous attention to detail.
Phase 1: The Daily Ritual: Establishing a Foundation for Cleanliness (Steps 1-3)
- Step 1: The Gentle Sweep (Daily – 5-10 Minutes)
- Tool of Choice: Microfiber Dust Mop:
- The microfiber dust mop is indispensable for daily debris removal. Its electrostatic properties attract and trap dust, dirt, and pet hair with exceptional efficiency.
- Choose a high-quality microfiber mop with a swivel head for enhanced maneuverability.
- Employ long, fluid strokes, moving with the grain of the wood. This prevents debris from lodging between planks and minimizes scratches.
- Alternative: Soft-Bristle Broom:
- If a microfiber mop is unavailable, a soft-bristle broom can be used. Ensure the bristles are gentle to avoid scratching the finish.
- Sweep in the direction of the grain, preventing debris from settling between planks.
- Target Areas:
- Focus on high-traffic zones: entryways, hallways, kitchens, and living areas.
- Pay attention to visible dust and debris.
- Tool of Choice: Microfiber Dust Mop:
- Step 2: The Vacuum Precision (Weekly – 10-15 Minutes)
- Tool of Choice: Vacuum with Soft Brush Attachment:
- A vacuum with a soft brush attachment is ideal for removing larger debris, pet hair, and crumbs.
- Crucially, avoid vacuums with beater bars, as they can damage the finish.
- A handheld vacuum is useful for quick spot cleaning and reaching tight corners.
- Technique:
- Use gentle, overlapping strokes to ensure thorough cleaning.
- Pay attention to edges and corners where dust and debris tend to accumulate.
- Frequency:
- Vacuum at least once a week, or more frequently in homes with pets or high traffic.
- Tool of Choice: Vacuum with Soft Brush Attachment:
- Step 3: Immediate Spill Response (As Needed – 1-2 Minutes per spill)
- Action: Blot, Don’t Rub:
- Liquid spills demand immediate attention. Use a dry, absorbent cloth or paper towels to blot the spill, preventing it from seeping into the wood.
- Avoid rubbing, which spreads the spill and can damage the finish.
- Residue Removal:
- If a residue remains, lightly dampen a clean cloth with water or a hardwood-specific cleaner.
- Gently wipe the area, followed by immediate drying with a clean, dry cloth.
- Use a spray bottle with diluted hardwood floor cleaner for stubborn residues.
- Action: Blot, Don’t Rub:
Phase 2: The Periodic Deep Clean: Restoring Shine and Removing Grime (Steps 4-6)
- Step 4: The Controlled Damp Mop (Bi-Weekly/Monthly – 15-20 Minutes)
- Tool and Technique:
- Use a microfiber mop, ensuring it’s only slightly damp. Excess moisture is the enemy of hardwood.
- Wring the mop thoroughly before use.
- A spray bottle to lightly mist the floor ahead of the mop, can also be used.
- Use a pH-neutral hardwood floor cleaner, diluted according to the manufacturer’s instructions.
- Mop in the direction of the wood grain, preventing streaks and ensuring a uniform shine.
- Overlap your strokes slightly to avoid leaving any areas untouched.
- Immediate Drying:
- Any remaining damp spots must be dried immediately with a clean, dry cloth.
- A second dry microfiber mop can be used to follow the wet mop.
- Tool and Technique:
- Step 5: Spot Treatment for Stubborn Stains (As Needed – 5-10 Minutes per stain)
- Identify the Stain:
- Different stains require different treatments.
- Water-based stains, oil-based stains, and pet stains each have their own removal methods.
- Apply Appropriate Solution:
- Use a hardwood-safe stain remover or a homemade solution (e.g., vinegar and water, baking soda paste).
- Test any solution in an inconspicuous area first.
- Gentle Scrubbing:
- Use a soft cloth or sponge to gently scrub the stain.
- Avoid abrasive materials that can damage the finish.
- Dry Thoroughly:
- Ensure the area is completely dry after treatment.
- Identify the Stain:
- Step 6: Professional Deep Cleaning (Annually/Bi-Annually – Varies)
- Benefits:
- Professional deep cleaning removes built-up grime and residue that regular cleaning cannot address.
- It can also revitalize the finish and extend the lifespan of your floors.
- Professional Expertise:
- Choose a reputable hardwood floor cleaning service with experience in your type of flooring.
- Benefits:
Phase 3: The Preventative Measures: Protecting Your Investment (Ongoing)
- Step 7: Strategic Mat and Rug Placement (Ongoing)
- Entrance Mats:
- Place mats at all entrances to trap dirt, moisture, and debris.
- Area Rugs:
- Use area rugs in high-traffic areas and under furniture to protect the floor from scratches and wear.
- Rug Material:
- Avoid rubber backed rugs, as they can trap moisture.
- Entrance Mats:
- Step 8: Furniture Protection with Felt Pads (Ongoing)
- Application:
- Attach felt pads to the legs of all furniture, including chairs, tables, and sofas.
- Replace worn pads regularly.
- Furniture Glides:
- For heavy furniture, consider using furniture glides, which allow for easier movement without scratching.
- Application:
- Step 9: Pet Care and Protection (Ongoing)
- Trimmed Nails:
- Keep pet nails trimmed to minimize scratches.
- Mats Under Bowls:
- Place mats under pet food and water bowls to prevent spills and moisture damage.
- Accident Prevention:
- Clean up pet accidents immediately, as urine can damage the finish.
- Trimmed Nails:
- Step 10: Humidity Control (Ongoing)
- Hygrometer Monitoring:
- Maintain a consistent relative humidity level between 35% and 55% using a hygrometer.
- Humidifiers/Dehumidifiers:
- Employ humidifiers or dehumidifiers as needed to regulate humidity.
- Ventilation:
- Ensure proper ventilation in high humidity areas, like bathrooms and kitchens.
- Hygrometer Monitoring:
- Step 11: Sunlight Protection (Ongoing)
- Curtains and Blinds:
- Use curtains or blinds to shield the floor from direct sunlight, which can fade and discolor the wood.
- UV-Blocking Window Film:
- Consider UV-blocking window film for added protection.
- Curtains and Blinds:
Phase 4: The Restoration Process: Revitalizing Worn Floors (Steps 12-13)
- Step 12: Recoating (Every 3-5 Years – Varies)
- Purpose:
- Recoating involves applying a fresh layer of finish to the floor, restoring its protective barrier and shine.
- Professional Application:
- Recoating is best performed by a professional to ensure a smooth, even finish.
- Purpose:
- Step 13: Refinishing (Every 10-20 Years – Varies)
- Purpose:
- Refinishing involves sanding down the existing finish and applying a new stain and finish.
- This is necessary when the finish is heavily damaged or worn, or when a color change is desired.
- Professional Expertise:
- Refinishing is a complex process that should only be performed by experienced professionals.
- Purpose:
Amazon Product Recommendations:
- Bona Hardwood Floor Cleaning Kit:
- Provides a complete set of tools and cleaners for effective hardwood floor maintenance.
- Bona Hardwood Floor Care Kit
- Furniture Felt Pads:
- Prevents scratches and damage from furniture.
- Search amazon for “furniture felt pads”.
- Hygrometer:
- To properly monitor humidity levels.
- Search amazon for “hygrometer”.
Conclusion:
This comprehensive step-by-step guide provides a detailed approach to hardwood floor care, covering daily routines, periodic maintenance, preventative measures, and restoration processes. By adhering to these steps, you can ensure your hardwood floors maintain their beauty and longevity, enhancing the aesthetic appeal and value of your home for years to come.
