
Hardwood flooring exudes timeless elegance and adds significant value to any home. Its natural beauty, durability, and warmth make it a popular choice for homeowners seeking a sophisticated and long-lasting flooring solution.
While professional installation is an option, many DIY enthusiasts find the process rewarding and cost-effective.
This detailed guide will equip you with the knowledge and steps necessary to confidently install hardwood flooring, transforming your space into a haven of style and comfort.
Why Choose Hardwood and DIY Installation?
- Aesthetic Appeal: Hardwood’s natural grain and rich tones create a visually stunning and inviting atmosphere.
- Durability and Longevity: Properly installed and maintained hardwood floors can last for decades, adding value to your home.
- Increased Home Value: Hardwood flooring is a desirable feature that can significantly boost your property’s resale value.
- DIY Satisfaction and Savings: Installing hardwood yourself offers a sense of accomplishment and significant cost savings compared to professional installation.
Phase 1: Essential Preparations – Setting the Stage for Success
- Material Selection and Acclimation:
- Choose the right type of hardwood for your needs (solid or engineered) and aesthetic preferences.
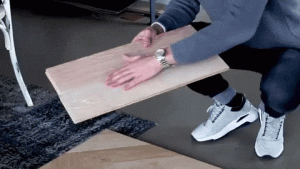
- Acclimation is crucial. Hardwood is a natural material that reacts to changes in humidity and temperature. Allow the flooring to acclimate to the room’s environment for at least 3-5 days (or as per manufacturer’s instructions) before installation. Stack the planks in the room to allow for proper airflow. Use a moisture meter to ensure the wood and subfloor moisture levels are compatible.
- Subfloor Preparation: The Foundation for a Flawless Finish:
- The subfloor must be clean, dry, level, and structurally sound.
- Remove any existing flooring, debris, or protruding nails.
- Inspect for unevenness and repair any dips or high spots. Leveling compounds or plywood underlayment can be used to create a smooth surface.
- For concrete subfloors, a moisture barrier (e.g., 6-mil polyethylene film) is essential to prevent moisture damage.
- For plywood subfloors, ensure it is securely screwed to the floor joists.
- Gathering the Necessary Tools and Materials:
- Measuring tape
- Circular saw or miter saw
- Flooring nailer (for nail-down installations) or appropriate adhesive (for glue-down installations)
- Rubber mallet
- Tapping block
- Pry bar
- Level
- Chalk line
- Spacers (1/2-inch to 3/4-inch)
- Underlayment (if required)
- Safety glasses and gloves
- Moisture meter.
Phase 2: Planning the Layout – Ensuring a Professional Finish
- Determining the Direction of the Planks:
- Typically, hardwood planks are installed parallel to the longest wall or perpendicular to the floor joists for structural stability.
- Consider the room’s layout and the direction of natural light to enhance the visual appeal.
- Establishing a Straight Starting Line:
- Use a chalk line to mark a straight line along the starting wall. This line will serve as a guide for the first row of planks.
- Accounting for Expansion Gaps:
- Hardwood expands and contracts with changes in humidity. Leave an expansion gap of 1/2-inch to 3/4-inch between the planks and the walls to allow for this movement. Spacers will help maintain this gap.
Phase 3: The Installation Process – Bringing Your Vision to Life
- Installing the Underlayment (If Applicable):
- For floating floors, roll out the underlayment and secure it with tape. Underlayment provides a moisture barrier, sound insulation, and a smoother surface.
- Laying the First Row:
- Begin installing the first row of planks along the chalk line, ensuring the expansion gap.
- Nail-down installation: Use a flooring nailer to secure the planks to the subfloor at a 45-degree angle through the tongue.
- Glue-down installation: Apply the recommended adhesive to the subfloor using a trowel and carefully place the planks.
- Floating installation: Click the planks together according to the manufacturer’s instructions.
- Continuing with Subsequent Rows:
- Stagger the end joints of the planks to create a visually appealing pattern and structural stability.
- Use the tapping block and rubber mallet to gently tap the planks into place, ensuring a tight fit.
- Maintain the expansion gap along the walls.
- Continue with your chosen installation method throughout the room.
- Cutting the Final Row:
- Measure the remaining space and cut the final row of planks to fit, maintaining the expansion gap.
- Use a pry bar to gently push the final row into place.
- Installing Transition Pieces and Baseboards:
- Install transition pieces where the hardwood meets other flooring types or levels.
- Install baseboards to cover the expansion gaps and provide a finished look.
Phase 4: Finishing Touches and Maintenance – Protecting Your Investment
- Cleaning and Inspection:
- Thoroughly clean the floor to remove any dust or debris.
- Inspect the floor for any gaps or imperfections and address them accordingly.
- Maintenance:
- Regularly sweep or vacuum to remove dirt and debris.
- Use a damp mop with a cleaner specifically designed for hardwood floors.
- Avoid using 1 excessive water or harsh chemicals.
1. procoatinc.com
- Place mats at entryways to prevent dirt and moisture from being tracked onto the floors.
- Consider having the floors refinished every several years to maintain their beauty and longevity.
SEO Optimization:
- Keywords: “install hardwood flooring,” “DIY hardwood installation,” “how to install hardwood floors,” “hardwood flooring installation guide,” “nail down hardwood,” “glue down hardwood,” “floating hardwood installation,” “hardwood floor acclimation.”
- Long-tail keywords: “how to install engineered hardwood on concrete,” “best way to install solid hardwood floors,” “tips for installing hardwood flooring yourself.”
- Internal and External Linking: Link to relevant resources and other pages on your website.
- Image Optimization: Use descriptive alt text for images.
- Meta Description: Write a compelling meta description that accurately reflects the content of the article.
By following this comprehensive guide, you can confidently install hardwood flooring and create a beautiful and lasting addition to your home. Remember to take your time, be patient, and prioritize safety throughout the process.