
Nail-down hardwood flooring remains a time-honored method, prized for its stability, longevity, and the authentic feel it imparts to a home.
While requiring a higher degree of skill than click-lock installations, mastering the nail-down technique allows for the creation of truly exceptional hardwood floors. This detailed guide will walk you through the process, providing expert insights to ensure a successful and enduring installation.
Understanding the Enduring Appeal of Nail-Down Hardwood:
The nail-down method involves securing solid hardwood planks directly to a wooden subfloor using specialized flooring nailers. This traditional technique offers several distinct advantages:
- Unparalleled Stability:
- Nailing provides a robust and secure connection, minimizing movement and creating a solid, unwavering floor.
- Enhanced Longevity:
- Properly nailed hardwood floors can withstand decades of use and multiple refinishing cycles, making them a long-term investment.
- Authentic Feel and Sound:
- Nail-down installations deliver the classic, solid feel and resonant sound associated with traditional hardwood flooring.
- Optimal for Solid Hardwood:
- This method is the optimal method for solid hardwood flooring.
Essential Preparations: Setting the Stage for Success:
- Subfloor Inspection and Preparation: The Foundation of a Flawless Finish:
- A sound, level, and dry subfloor is paramount for a successful nail-down installation.
- Inspect the subfloor for any imperfections, such as loose boards, uneven spots, or moisture damage.
- Secure any loose boards and level uneven areas using plywood or self-leveling compound.
- Ensure the subfloor is clean and free of debris.
- Moisture testing of the subfloor is very important.
- Acclimation: Allowing the Wood to Adapt:
- Hardwood flooring must acclimate to the room’s temperature and humidity for several days before installation.
- This process prevents warping and shrinking after installation.
- Moisture content of the hardwood flooring, and the subfloor should be checked with a moisture meter.
- Gathering the Necessary Tools and Materials:
- Solid hardwood flooring planks
- Flooring nailer (pneumatic or manual)
- Flooring nails or cleats
- Measuring tape
- Chalk line
- Hammer
- Pry bar
- Safety glasses
- Knee pads
- Moisture meter.
The Nail-Down Installation Process: A Step-by-Step Guide:
-
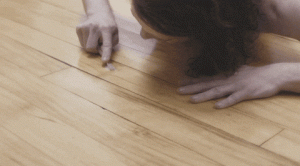
Establishing a Straight Starting Line:
- Accurate layout is essential for a straight and even floor.
- Use a chalk line to mark a straight starting line, ensuring it is parallel to the longest wall.
-
Laying the First Rows:
- Begin laying the first row of planks along the chalk line, with the tongue side facing the starting wall.
- Face-nail the first row, as the flooring nailer may not fit close enough to the wall.
- Pre drilling pilot holes is recommended.
-
Using the Flooring Nailer:
- Once sufficient space is available, use the flooring nailer to secure the remaining planks.
- Angle the nails at 45 degrees through the tongue of each plank, ensuring they are driven securely into the subfloor.
- Maintain consistent spacing between nails.
-
Staggering the Joints:
- Stagger the end joints of subsequent rows to create a random and visually appealing pattern.
- This also adds structural integrity to the floor.
-
Navigating Obstacles and Edges:
- Measure and cut planks accurately to fit around obstacles, such as pipes or vents.
- For the final rows, you may need to face-nail or use a pry bar to secure the planks.
-
Finishing Touches:
- Remove any debris and install baseboards or moldings to cover the expansion gaps.
Key Considerations for a Successful Nail-Down Installation:
- Subfloor Integrity:
- A solid subfloor is crucial for a stable and long-lasting nail-down installation.
- Moisture Control:
- Excessive moisture can cause hardwood to warp or cup.
- Address any moisture issues in the subfloor before installation.
- Proper Nailing Technique:
- Using the correct nailing angle and spacing is essential for a secure and even floor.
- Safety Precautions:
- Wear safety glasses and knee pads to protect yourself during installation.
- Use caution when operating power tools.
- Acclimation is Critical:
- Failure to properly acclimate the flooring, will result in flooring failure.
Why Nail-Down Remains a Preferred Method:
While click-lock installations offer convenience, nail-down hardwood floors provide a level of stability and longevity that is unmatched. For homeowners seeking the authentic feel and enduring beauty of traditional hardwood, the nail-down method remains a preferred choice.
By following this comprehensive guide and adhering to expert advice, you can confidently install nail-down hardwood floors, creating a stunning and lasting addition to your home.