
In today’s fast-paced world, time is a precious commodity. While the allure of hardwood floors remains strong, the thought of a lengthy installation process can be daunting.
This article is your guide to mastering quick hardwood installation, allowing you to achieve stunning results without sacrificing efficiency.
We’ll explore time-saving techniques, efficient tools, and strategic approaches to streamline your project, transforming your space with speed and style.
Section 1: Planning for Speed: Streamlining Your Project
- 1.1. Rapid Acclimation Techniques:
- While full acclimation is ideal, accelerate the process by ensuring optimal airflow and temperature consistency.
- Utilize climate-controlled rooms and dehumidifiers/humidifiers if necessary.
- Spread out planks in thin layers to maximize surface area exposure.
- 1.2. Pre-Installation Subfloor Optimization:
- Minimize leveling time by thoroughly inspecting and addressing subfloor issues before delivery.
- Use self-leveling compounds for larger areas and rapid-drying patching materials for small imperfections.
- Consider pre-finished subfloor panels for speed.
- 1.3. Efficient Material Selection:
- Choose engineered hardwood for quicker installation due to its stability and ease of handling.
- Opt for pre-finished planks to eliminate sanding and finishing time.
- Select click-lock or floating floor systems for fast, glue-less installations.
- 1.4. Strategic Layout Planning:
- Create a detailed layout plan beforehand to minimize on-the-fly decisions.
- Utilize CAD software or online floor planning tools to visualize and optimize plank placement.
- Pre-cut as many boards as possible.
Section 2: Tools and Techniques for Rapid Installation
- 2.1. Power Nailers and Staplers:
- Invest in a high-quality pneumatic flooring nailer or stapler for fast and consistent fastening.
- Ensure proper calibration and use appropriate fasteners for your flooring type.
- 2.2. Precision Cutting Tools:
- Utilize a table saw or track saw for accurate and rapid straight cuts.
- Employ a power miter saw for precise angle cuts and efficient trim work.
- Use a good quality jigsaw for fast curved cuts.
- 2.3. Click-Lock Flooring Systems:
- Master the technique of click-lock installation for its speed and ease.
- Practice connecting planks before installation to develop proficiency.
- Floating floors are very fast.
- 2.4. Organized Workflow:
- Establish a clear workflow and designate specific tasks to each team member (if applicable).
- Stage materials and tools strategically to minimize movement and wasted time.
- Keep a clean work area.
Section 3: Time-Saving Installation Strategies
- 3.1. Row-by-Row Efficiency:
- Pre-cut multiple rows of planks to length, minimizing interruptions.
- Install entire rows at once, maximizing continuous progress.
- 3.2. Section-by-Section Approach:
- Divide the room into manageable sections and complete each section before moving on.
- This approach minimizes clutter and allows for focused work.
- 3.3. Minimizing Waste:
- Accurately measure and calculate material needs to avoid excess waste.
- Utilize cut-offs from previous rows to start new rows, reducing material consumption.
- 3.4. Efficient Trim Installation:
- Pre-paint or stain baseboards and shoe molding to eliminate drying time.
- Use a finish nailer for rapid and secure trim installation.
- Use a laser level to ensure all trim is installed at the same height.
Section 4: Post-Installation Speed and Efficiency
- 4.1. Rapid Cleaning and Inspection:
- Utilize powerful vacuums and microfiber cloths for quick and thorough cleaning.
- Conduct a rapid inspection to identify and address any minor imperfections.
- 4.2. Quick Transition Installation:
- Pre-finish transition pieces to match the flooring.
- Use construction adhesive in addition to fasteners to speed up installation.
- 4.3. Efficient Furniture Placement:
- Plan furniture placement in advance to minimize unnecessary movement.
- Use furniture sliders to protect floors and expedite placement.
Section 5: Troubleshooting Quick Installation Challenges
- 5.1. Addressing Gaps and Unevenness:
- Use wood filler for minor gaps and imperfections.
- Employ a rubber mallet and tapping block to correct uneven plank placement.
- 5.2. Dealing with Obstacles:
- Pre-cut planks to fit around obstacles before installation.
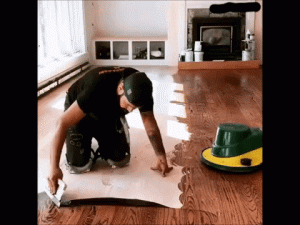
- Use templates to accurately trace and cut complex shapes.
- 5.3. Managing Time Constraints:
- Prioritize essential tasks and delegate non-critical ones.
- Set realistic deadlines and allocate buffer time for unexpected delays.
Conclusion:
Quick hardwood installation is achievable with careful planning, efficient tools, and strategic techniques. By mastering these methods, you can transform your home with stunning hardwood floors in a fraction of the time. Remember to prioritize safety, maintain a well-organized workflow, and utilize high-quality materials for a lasting and beautiful result.